Friday, October 23, 2020

Baked Chicken Sandwiches

These baked chicken sandwiches are a crowd pleaser in our house, and even better than that - they freeze really well! I bake them up completely, let them cool then place them into freezer bags. Perfect for future dinners, or leftover lunches! I usually grill or bake up a big batch of chicken, and when I have leftovers I use them for this. If you want to make this recipe even quicker, pick up a rotisserie chicken from the store that's already cooked. 

Crescent rolls typically go on sale in the fall months so I always snag a few extra and make triple batches of these for easy freezer meals. Also check out my recipes for my Breakfast Casserole, which uses the crescent rolls as a bottom crust. And, the Cream Cheese Squares are like a sweet cream cheese danish that is perfect with a cup of coffee in the morning or as a dessert topped with fruit and chocolate syrup. We hope you enjoy this recipe as much as we do!! 


Baked Chicken Sandwiches
(Serves 8)

3 cups cooked, shredded chicken
3oz of cream cheese, softened
3-4 tbsp. milk
Salt & pepper to taste
2 cans of crescent rolls
Half a stick of butter, melted 
Italian style bread crumbs

Combine cooked chicken, cream cheese milk, salt and pepper in a bowl. Start with 3tbsp of milk, it should be completely combined and be somewhat moist like a chicken salad. If you need to, add the last tbsp of milk. 

Lay out 8 triangles of crescent rolls from the first can on a greased baking sheet. Evenly spread the chicken mixture on top of each crescent triangle, making sure to get mixture into each corner. Then, top each one with a crescent triangle from the second can, pinching the edges to seal. 

Spread the bread crumbs onto a plate. Brush the top of each sandwich with melted butter, then place that side down into the Italian bread crumbs. Brush the top side of the sandwich and then flip into breadcrumbs to coat. I work one sandwich at a time, placing them back onto the baking sheet. 

Bake at 350 degrees for about 20 minutes until golden brown

I always keep macaroni and cheese and a can of green beans on hand to serve with these for an easy comfort meal! 

Enjoy! 

Wednesday, August 5, 2020

Drunken Rice Noodles with Pork

This is one of my favorite cast iron skillet recipes from one of my favorite cookbooks The Lodge Cast Iron Classics.  Here is the video of how I tweak this recipe with ingredients I can easily find, and I make it less spicy with a jalapeno instead of a chili pepper so my kids still eat it!  


Ingredients
1, 7-ounce package dried medium rice noodles
¼ cup canola oil
4 garlic cloves, chopped
2 Thai chili peppers, chopped (optional)
2 boneless pork chops, thinly sliced and marinated in 2 tablespoons of soy sauce for 5 minutes
4 tablespoons soy sauce
1 tablespoon fish sauce
1 tablespoon oyster sauce
3 tablespoons sugar
1 teaspoon white pepper
½ cup water, as needed
1 red bell pepper, sliced into ¼" strips
1 cup snow peas, trimmed and cut in half
1 cup fresh basil, plus more for garnish

Directions
Cover noodles with warm water for 10 minutes, or according to package instructions, then drain water, and set aside.
Gradually heat Stir Fry Skillet to medium-high heat. Add the oil and heat for 1 minute. Add garlic and chilies. Use a wide metal spatula to stir until the mixture is fragrant and the garlic starts to turn color, about 1 minute.
Add the pork and stir until cooked through, 4-6 minutes. Add the drained noodles, soy sauce, fish sauce, oyster sauce, sugar, white pepper, and water. Cook, stirring constantly, until noodles are almost soft, 5-8 minutes.
Stir in the red pepper strips and snow peas. Cook 2-3 minutes. Turn off the heat, stir in the basil, and serve immediately.


Friday, February 14, 2020

Rain delays & Barn Stays

Pouring down rain and power outages at school means a “snow day” for the girls! This year we have seen only one snowflake fall from the sky, but we have had a TON of rain. 


All of this rain has put so many of our outdoor farm projects behind schedule.


 The two stall, one tack room run in barn we started last August for the horses still isn’t complete. We don’t try to get many outdoor projects done during the winter. We try to use that time to rest up for the following spring and summer. 


But, we were definitely hoping to have this barn completed before now. From here on out, we’re starting major projects in the spring! 

We’re close to being done- just one more stall door to build, paint and a little grading in the front and it will finally be complete! Having it definitely helps at feeding time, and I'm thankful that these two mares have shelter for all of this rain.  

This morning the girls got to help me, but they got a little distracted with all of the water and testing out items that would float! 


This muddy pony is ready for a spring bath and a field full of green grass. Mud on the farm is just how it goes, but one of our projects this coming year is to really work on the grass and field rotations so we see much less mud next year, both in the horse field and in the yard.


All of the horses will be put up in their barns this morning with some hay so they stay somewhat dry.


A quick stop by the chicken coop, which is also ready for its spring pressure washing and clean out, and we are headed back into the house to get dry and warm.


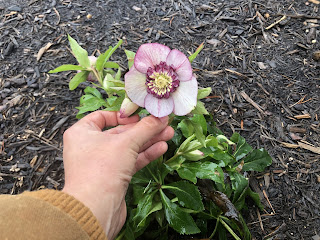
At least the Hellebores and Pansies are blooming to give us hope that the sun will again shine one day, we will pack up the muck boots and heavy clothing, the mud will dry up and everything will again turn green. 


Until then, we will stay warm by the fire, watching it rain and making plans for the yard work ahead, resting up for more fencing to install, and getting ready for the new baby girl to make her arrival in May!  I should probably use this time to get her nursery together, and start thinking about ordering a crib! 


xoxo, 

Jennifer 


Farmhouse Front Porch Makeover

There's nothing like ending the day wrapped in a blanket, with a glass of wine overlooking the farm. This spot was definitely craving so...